Showing posts with label upgrades. Show all posts

Sunday, 23 September 2012

Raising the roof

After what seemed like a long wait, the roof panel from Germany is finally in. Ordered through Mark at MegaVanMats, I left the van with him for a series of lining sessions that he fit in 'as-and-when' around his busy business.

Here's the results of the hard work and waiting:


The material is almost a perfect match for the standard cab headlining and joins pretty seamlessly. The four recessed panels mirror the panels of the van's walls perfectly keeping everything looking nice and symmetrical.

A slight adjustment was made by trimming the rear of the roof so it didn't wrap around all the way to the rear door rubber - I preferred the look of having the rear aperture carpeted all the way around.

Whilst the van was in at MVM, Mark also made up a set of footwell mats:


I'm fairly sure he does a range of colours and alternate edging colours. These have proven to be pretty good; well-shaped, hard-wearing, and fit directly to the standard VW mounts.

Just the floor to sort now. Or might that be a second row of seats...?

Saturday, 14 April 2012

Front splitter

So the Caddy is looking much better after last weeks lowering - but I'd love to go lower. Practicality and an empty wallet stop me from going any further though. But there are some visual tricks to make the van appear a little lower to the ground - one of these is by adding a front splitter.

Part of the appeal of modifying vehicles from the VAG family is that every now and then you'll find a part from another vehicle that suits yours perfectly. One of these parts is the front splitter from Seat's Leon Cupra R - part number 1ML 805 903 if you're interested.

An extra horizontal line at the front draws your eye nearer to the ground
Just brushing the green stuff
The sill line is now followed around to the front of the vehicle
Only a small part but it makes such a difference visually.

One word of note: please don't go on eBay and buy from someone selling a 'brand new, still in the wrapper, RARE!' front splitter - they're not rare! Phone your local TPS or Seat Dealer and order one from them and hopefully you'll get one for a sensible (and not over-inflated) price.

Friday, 6 April 2012

Lowering tweaks

Finally, a free morning to get the rear shocks changed for something a little stiffer, drop the rear a couple of notches on the hangers, and then adjust the front coils to suit.

There's just a small matter of re-centering the rear wheels and we're done. Here's the results:


Much better I'm sure you'll agree.

Big thanks must go to the talented JC at JC Motors for taking his time to get that 'just right' stance.

Thursday, 5 April 2012

Rear lining - a sneak peek

Just a quick post to show the progress to-date on the rear lining that's been taking place this week.


As much as I'd love to take credit for this part of the van's transformation, the applause must go to Mark at MegaVanMats.

More pics to follow this weekend.

Sunday, 11 March 2012

The RAD Roadtrip

370 miles, several UK towns, cities and motorways later, and we're back from a mini-weekend break that involved bolting-up a few new parts to the Caddy.

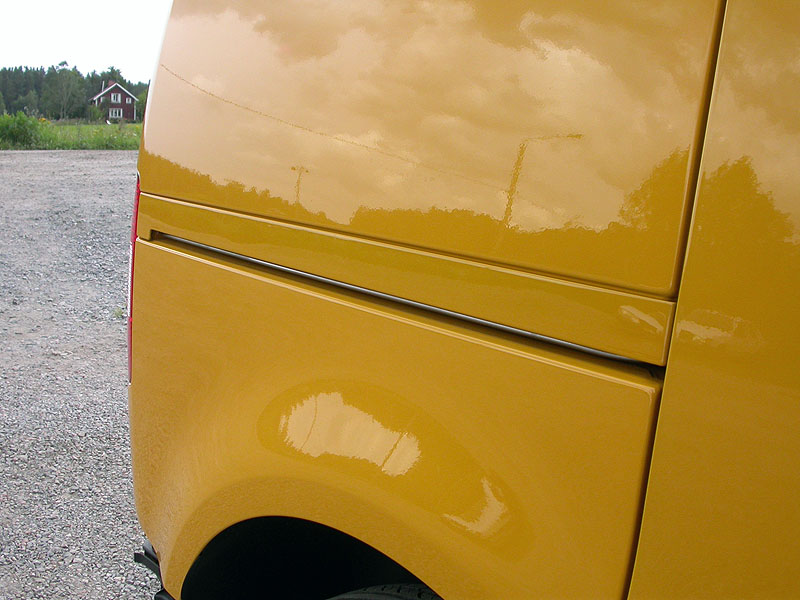
First up was a Friday morning blast down to RAD: Reflex Auto Design in Brixworth, just north of Northampton. Job one was to fit a sliding-door rail cover, painted in Raven Blue this more than finishes off the side of the van:


Next up (while the paint is in the gun), a rear spoiler to finish off the rear end:


And finally, a sump-guard is bolted up to replace the original plastic unit and allow us to run the ride-height a little nearer the tarmac without the worry of speedbumps.


All excellent products and RAD have been a pleasure to deal with from initial emails to driving away. Quality is high and they take pride in what they do.

Just before driving away we caught a glimpse (well, had a good nosey around) another Caddy that was in for some last-minute tweaks before Ultimate Dubs. I'd seen this van before in Magazines and on the forums, but to see it in it's new guise, show-fresh and ready to roll left me absolutely awe-struck. More info on this in the next post...

Sunday, 26 February 2012

Wheels and tyres are on!

The long Winter-wait is at an end; the Helios are finally on.


Tyres were sourced from Camskill - great value for money on brand-name tyres, good stock availability and cheap, quick delivery makes these my first choice every time for buying tyres.

Money saved here has meant we can jump up a level, quality-wise; spec'ing a set of four Falken FK452 in 235/35/19 to perfectly match the 19x8.5 wheels without any impractical stretch of the previously fitted wheels. These also have little effect on the speedo being within 2% of the same rolling diameter as the stock 15" steels.

But who to fit them? Our local tyre-fitting shop don't seem to like us walking in with our tyres - there's no money to be made for them - so after some inquiries and a word-of-mouth recommendation, we got in touch with Stuart at Unique Tyres.

Stuart turned up in his kitted-out Merc Sprinter, fitted a brand new head to his fitting machine and had the four wheels built-up and balanced in no time. For the total sum of £60, a cup of tea and plenty of v-dub chat, the wheels were then checked and mounted in a matter of minutes.


Visually, the front needs to come back down a bit - maybe the back a touch too. It's also apparent that the rear wheels are pulling forwards in the arch; common for modern lowered Volkswagens with a beam rear-end. Hopefully a quick trip to see JC at JC Motors should rectify these.


I'm absolutely over-the-moon with the way the Helios wheels have transformed the look of the Caddy. They keep that whole 'factory' OEM look - and the rarity-factor of not seeing many sets about appeals in a world of endless BBS replicas and cheap Supermarket alloys.
In particular, I like the way the centre-cap matches the centre of the steering wheel - the way VW would have done it if they were building a Caddy without budget constraints:


So there we have it; just a few more lows and a tweak of the stance and we're almost there! Time to turn my focus back to the interior...

Sunday, 19 February 2012

Retail therapy

The hammering of the credit card has begun!

Well, not quite. I've made some tentative enquiries with Reflex Auto Design for a few things (hopefully) before Ultimate Dubs in March. Firstly a sliding door rail cover, painted in Raven Blue. A rear spoiler, bought as part of a forum group buy, painted in Raven Blue at the same time then fitted. And finally a sump guard so I can wind the front suspension back down a little and not clench every time I see a speed bump!

The spending didn't stop there. Today's trip to Dubfeeze has seen us pick up a new tax disk holder, some replenishments of Meguiar's cleaning products (roll-on Spring!) and a set of UK-legal pressed metal plates complete with German dealer surrounds:


There didn't seem to be many Caddys kicking around at Dubfreeze, but then again, it was too cold to go searching for any length of time! Here's a couple:


Fingers-crossed I'm sorted for a tyre-fitter too, so the Helios could be on sooner than expected - there won't be any more snow now, right?

Saturday, 18 February 2012

Bike mount - part two

The trial fit.

Here's the RockyMounts DriveShaft temporarily in place.


There's loads of room around the bike (you could easily have the driver's seat right back in the rails and still have enough room) and putting the bike in the van before carpeting has given me an idea for storing the front wheel and other associated bike bits - more on this later!

All I need now is a way of attaching the lateral bar, that the DriveShaft will be bolted to, to the two tie-down loops at the back of the van.

Monday, 13 February 2012

Bike mount - part one

As readers of this blog and my T5 blog will know, I'm a fairly keen mountain-biker. And whilst it's easy to carry the bike around the back of the T5, the Caddy seems less accommodating for the bike and other gear that goes along with it.

Bike and Transporter in perfect harmony
I've seen a few homemade bike carriers for the Caddy; some better than others, but in my quest to keep things looking as 'factory' as possible I didn't want anything too obvious-looking (if that makes sense?).

My other predicament was that I run a front fork with a 15mm bolt-thru axle (a bit like a motorbike) and all I keep finding are bike mounts suitable for quick release wheels...

So after a few months trawling the internet I found RockyMounts, based in Boulder, Colorado. They've been making ski and bike racks for years and I was particularly interested when I saw their DriveShaft mount that was specifically designed for universal mounting on any truck bed. The DriveShaft model is designed purely for bolt-thru axles (or a bolt-thru adaptor) in standard form for 15mm axles or 20mm with a set of nylon shims. I'll let the pictures explain:

The DriveShaft in open position...
...drop the front fork in...
...close the clamp, pull the handle and lock in place.
Being lockable is another bonus as I plan to leave the bike in the van whilst at work - the lock is an added deterrent for any would-be bike thief.

I'm still quite a way off this being fitted; carpeting has ground to a halt while the weather is too cold, and the floor will need to go in after carpeting.

Right, now to find a solution to storing the front wheel...

Sunday, 22 January 2012

The fins are in...

With one last trimming session using two more lower side inserts to 'blend' the edges to the existing bumper, we're finally ready for a coat of black plastic paint and pop into place. Bonded in with a EvoStick's Time Bond contact adhesive and then finish up any gaps with Black Sikaflex, I'm hoping that nothing falls out on the way to work in the morning!

Here's the end result, much better than the gaping hole that was there before:


Not a bad job for someone that has a dislike of working with plastics, spray paints and glue! I did mention in the previous post that I was looking into something different for the finish - well, I've decided against it at the moment... I was thinking of stickerbombing the two horizontal fins but then thought this might attract too close a glance at my handywork (and the whole stickerbomb thing is a little 'last year'), hence I'm leaving them black... for now.

Saturday, 14 January 2012

More Fin Trim Fun

Following on from the previous post, time for a bit more fine-tuning of the replacement fin section for the bumper.

Out with the junior hacksaw for some precise cutting:

Once a full bumper, now reduced to 60cm wide piece!
Then followed quite a lot of cut-a-bit, measure-a-bit, cut-a-bit, trial-fit, measure, cut, try, repeat, repeat... until:


Okay, so the plastic is a little wonky in the middle, but this tidies-up the front-end instantly. On with a quick coat of black plastic bumper paint and I've a little something else in store before final fitment... don't worry, it's not that horrible boy-racer mesh grille or anything too tacky!!!

Tuesday, 27 December 2011

Fitting gifts

There's not much happening between Christmas and New Year so I thought I'd take advantage of a day's fine weather to give the van a much-need clean. This is also a great opportunity to fit the gifts I received for Christmas!

First up; a set of Heko wind deflectors:


For no other reason than I like them - I have a set fitted to the T5 too - ideal for when you want some fresh air in but not the rain, easy to fit too - no more than a minute or so.

Then, a swap from the standard silver lettering to some genuine German red lettering:


These must give me another 15bhp, right?

Sunday, 18 December 2011

Let the fin trim begin

A quick progress update. The carpet-lining has ground to a halt, two reasons; firstly, I ran out of glue for doing the carpeting in one bulk session and didn't want to start a bit without being able to finish. And secondly, I ran out of talent - I made a complete balls-up of the headlining - with the headlining panel removed I had it covered in glue ready to roll out the headlining fabric, got half way across the board and (whilst working in the confines of a cramped single-garage) moving from one end of the board to the other I let the fabric roll back up on itself which smeared the slowly drying glue onto the visible side.

Annoyed with myself I closed the garage door and called it a day (sometimes the best way) only to find out that the glue had gone off and stuck the first section of the fabric permanently to the board. Fold board in half, go to VW and order new board.

So in the mean time I've been setting about the reinstating of the lower fins in the bumper:
The big-hole, some people like it but not me.
Step one was to find a bumper. A quick post in the wanted section on Caddy2k and within 48 hours I'd got one... for nowt! Cheers Mel!

A standard, no frills front bumper

Step two: roughly cut around the area required before some more delicate trimming.


Step three: closer trimming around the fins and legs prior to trial fitting. For this I used a Dremel with a drill bit, making regular perforations along the desired cut line and then joining the dots to make the final cut. Cleaning up the rough edges can then be done, surprisingly, by warming the plastic up and cutting with a good pair of scissors!

I'll hopefully finish this job between Christmas and New Year. You never know, I might even get some carpeting done too!

Tuesday, 6 December 2011

Wheels for 2012

Here's another teaser for next year's wheels:


A set of four 19" VW Helios, shipped from Germany, stripped, blasted, powder coated, top coat, clear coat and baked to look as good as a new set. Combined with a fresh set of centre caps - you'll understand why I'm looking forward to next Spring!

Saturday, 3 December 2011

Tuesday, 29 November 2011

Wanted: Standard front bumper

Have you got one lying around from a recent conversion?

I only need the lower middle fins as shown below:


Leave a comment below or email rpcreative@hotmail.com

UPDATE: One bumper collected from a fellow Caddy2k forum member. I've another one waiting in the wings too (in case I make a mess of this first one!).

Sunday, 27 November 2011

Sound-deadening pt2

Just a quick update. The cheaper sound-deadening material went down on the floor and had much the same effect as Dynamat; the van now feels much more 'solid' and quieter.


The last of the Dynamat went on the roof in the spots that VW didn't seem to bother with! This weekend's work has made a massive difference and well worth the outlay.

As a side-job I even managed to unpick the wiring harness for the towing electrics and tuck it out of the way ready for carpeting.

Saturday, 26 November 2011

Sound-deadening

The flash-banding used in a previous post was only ever going to do so much when it comes to sound-deadening. This, combined with a change of approach when it comes to carpet-lining, has left me with a need to do a little more to dampen the echoes of an empty van.

Dynamat in it's various forms has been around for a number years and seems to be de rigueur when it comes to lining the inside of a vehicle. I started reading up on sound-deadening on both the Caddy2k forum and the Edition38 forums to see what products others have used and how they applied it. The only downside of Dynamat - the cost.

My next port of call was eBay to see what sort of prices could be found on there. Pretty good, but after a little more searching and calculating price per square-foot, a car audio company selling on Amazon worked out the best.

I ordered five sheets of 18" x 32" Dynamat Xtreme - which is mainly used for car boots, doors and floors. This is to be used for the rear wheel arches and side panels. I also ordered several metres of an un-branded (and slightly thinner) version for the rear floor.
Easy to cut and apply, with a bit of pre-planning the Dynamat goes on in minutes:


A quick tap of the panels and the difference is instant; from tink-tink to thonk-thonk. Getting in and closing the doors no longer feels like getting in an empty van. More on the sound-deadening on the floor coming soon...

Saturday, 19 November 2011

Engine Covered

Now there's not many jobs under the bonnet that I'll tackle myself, but this one is probably the easiest of all!


Let's face it, the 1.9TDI engine in the Caddy isn't the most aesthetically wonderful piece of engineering, and the lack of an engine cover only adds to the basic-van-austerity-look... time to cover it over.

The 1.9TDI is a familiar engine across the whole VAG range; appearing in VWs, Audis and Skodas. For this particular model I needed to look for one that would fit the 'BLS' coded engine - picked out by the oil-filler being on the left. After scouring eBay for a week or two (finding nothing but broken or over-priced offerings from dismantlers), this Audi version came up on the Caddy2k forums.


The mounting points are already on the Caddy's engine, all I have to do is pop the inner section on first, then press the outer section into place. The under-side of the covers have a rubber surface to them which is supposed to 'dampen' engine-noise. So far I can't say I've noticed any difference (although I am missing the under-bonnet lining of higher-spec'd models).

Here's the cover in place:


Looks like it was always meant to be there. And fills out the engine bay too, making the engine look bigger - so that must give me another 15bhp, right?