

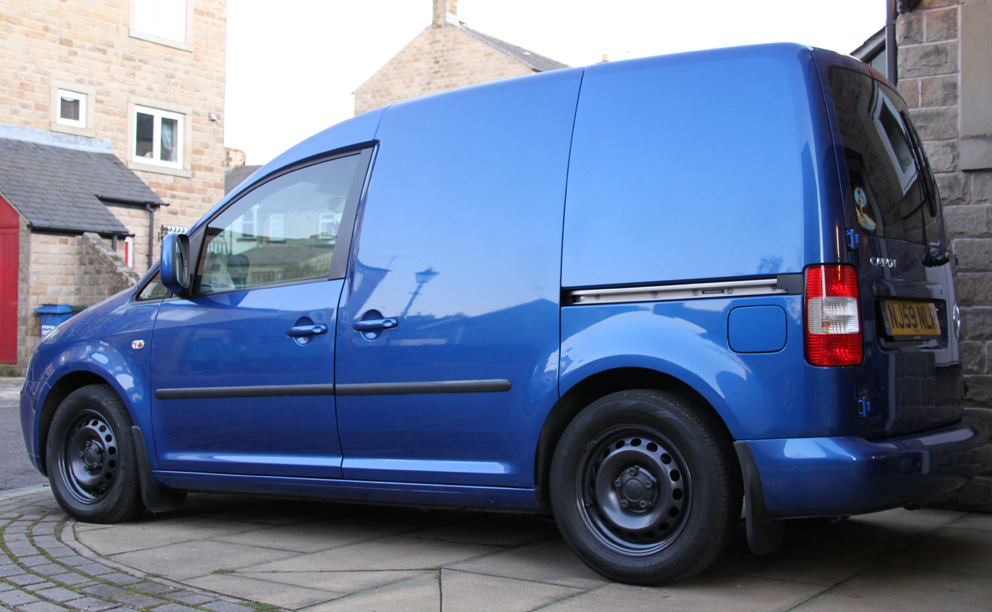
Tuesday 27 December 2011
Fitting gifts
There's not much happening between Christmas and New Year so I thought I'd take advantage of a day's fine weather to give the van a much-need clean. This is also a great opportunity to fit the gifts I received for Christmas!
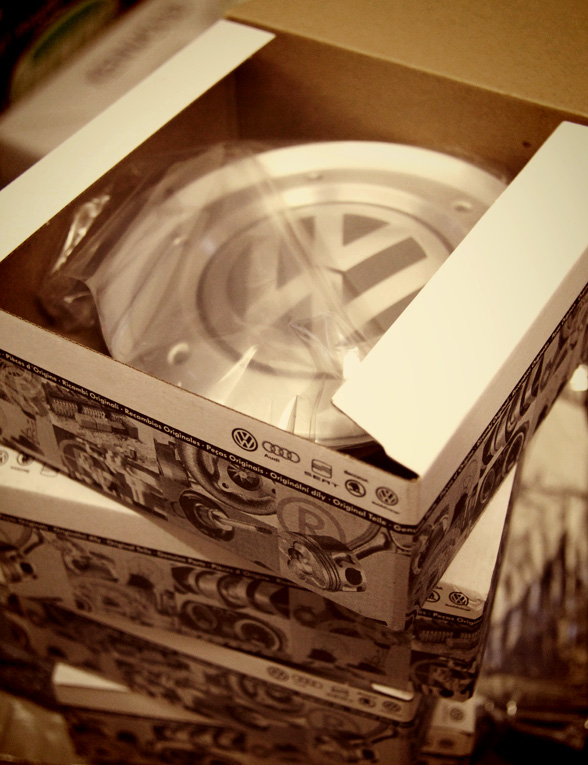
First up; a set of Heko wind deflectors:

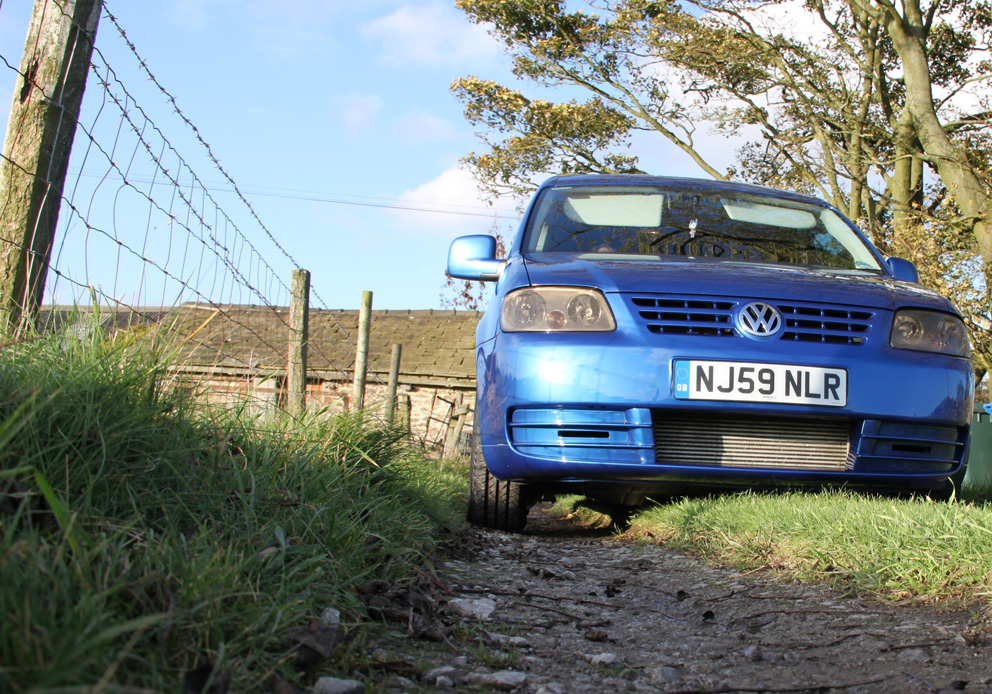
For no other reason than I like them - I have a set fitted to the T5 too - ideal for when you want some fresh air in but not the rain, easy to fit too - no more than a minute or so.
Then, a swap from the standard silver lettering to some genuine German red lettering:

These must give me another 15bhp, right?
First up; a set of Heko wind deflectors:

For no other reason than I like them - I have a set fitted to the T5 too - ideal for when you want some fresh air in but not the rain, easy to fit too - no more than a minute or so.
Then, a swap from the standard silver lettering to some genuine German red lettering:

These must give me another 15bhp, right?
Sunday 18 December 2011
Let the fin trim begin
A quick progress update. The carpet-lining has ground to a halt, two reasons; firstly, I ran out of glue for doing the carpeting in one bulk session and didn't want to start a bit without being able to finish. And secondly, I ran out of talent - I made a complete balls-up of the headlining - with the headlining panel removed I had it covered in glue ready to roll out the headlining fabric, got half way across the board and (whilst working in the confines of a cramped single-garage) moving from one end of the board to the other I let the fabric roll back up on itself which smeared the slowly drying glue onto the visible side.
Annoyed with myself I closed the garage door and called it a day (sometimes the best way) only to find out that the glue had gone off and stuck the first section of the fabric permanently to the board. Fold board in half, go to VW and order new board.
So in the mean time I've been setting about the reinstating of the lower fins in the bumper:
Step one was to find a bumper. A quick post in the wanted section on Caddy2k and within 48 hours I'd got one... for nowt! Cheers Mel!

Step two: roughly cut around the area required before some more delicate trimming.

Step three: closer trimming around the fins and legs prior to trial fitting. For this I used a Dremel with a drill bit, making regular perforations along the desired cut line and then joining the dots to make the final cut. Cleaning up the rough edges can then be done, surprisingly, by warming the plastic up and cutting with a good pair of scissors!
I'll hopefully finish this job between Christmas and New Year. You never know, I might even get some carpeting done too!
Annoyed with myself I closed the garage door and called it a day (sometimes the best way) only to find out that the glue had gone off and stuck the first section of the fabric permanently to the board. Fold board in half, go to VW and order new board.
So in the mean time I've been setting about the reinstating of the lower fins in the bumper:
 |
| The big-hole, some people like it but not me. |
 |
| A standard, no frills front bumper |

Step two: roughly cut around the area required before some more delicate trimming.

Step three: closer trimming around the fins and legs prior to trial fitting. For this I used a Dremel with a drill bit, making regular perforations along the desired cut line and then joining the dots to make the final cut. Cleaning up the rough edges can then be done, surprisingly, by warming the plastic up and cutting with a good pair of scissors!
I'll hopefully finish this job between Christmas and New Year. You never know, I might even get some carpeting done too!
Tuesday 6 December 2011
Wheels for 2012
Here's another teaser for next year's wheels:

A set of four 19" VW Helios, shipped from Germany, stripped, blasted, powder coated, top coat, clear coat and baked to look as good as a new set. Combined with a fresh set of centre caps - you'll understand why I'm looking forward to next Spring!

A set of four 19" VW Helios, shipped from Germany, stripped, blasted, powder coated, top coat, clear coat and baked to look as good as a new set. Combined with a fresh set of centre caps - you'll understand why I'm looking forward to next Spring!
Saturday 3 December 2011
Tuesday 29 November 2011
Wanted: Standard front bumper
Have you got one lying around from a recent conversion?
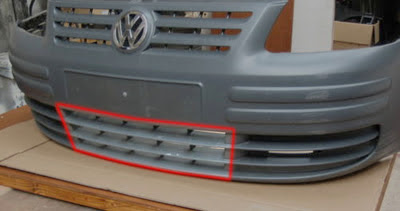
I only need the lower middle fins as shown below:
Leave a comment below or email rpcreative@hotmail.com
UPDATE: One bumper collected from a fellow Caddy2k forum member. I've another one waiting in the wings too (in case I make a mess of this first one!).
I only need the lower middle fins as shown below:

Leave a comment below or email rpcreative@hotmail.com
UPDATE: One bumper collected from a fellow Caddy2k forum member. I've another one waiting in the wings too (in case I make a mess of this first one!).
Sunday 27 November 2011
Sound-deadening pt2
Just a quick update. The cheaper sound-deadening material went down on the floor and had much the same effect as Dynamat; the van now feels much more 'solid' and quieter.

The last of the Dynamat went on the roof in the spots that VW didn't seem to bother with! This weekend's work has made a massive difference and well worth the outlay.
As a side-job I even managed to unpick the wiring harness for the towing electrics and tuck it out of the way ready for carpeting.

The last of the Dynamat went on the roof in the spots that VW didn't seem to bother with! This weekend's work has made a massive difference and well worth the outlay.
As a side-job I even managed to unpick the wiring harness for the towing electrics and tuck it out of the way ready for carpeting.
Saturday 26 November 2011
Sound-deadening
The flash-banding used in a previous post was only ever going to do so much when it comes to sound-deadening. This, combined with a change of approach when it comes to carpet-lining, has left me with a need to do a little more to dampen the echoes of an empty van.
Dynamat in it's various forms has been around for a number years and seems to be de rigueur when it comes to lining the inside of a vehicle. I started reading up on sound-deadening on both the Caddy2k forum and the Edition38 forums to see what products others have used and how they applied it. The only downside of Dynamat - the cost.
My next port of call was eBay to see what sort of prices could be found on there. Pretty good, but after a little more searching and calculating price per square-foot, a car audio company selling on Amazon worked out the best.
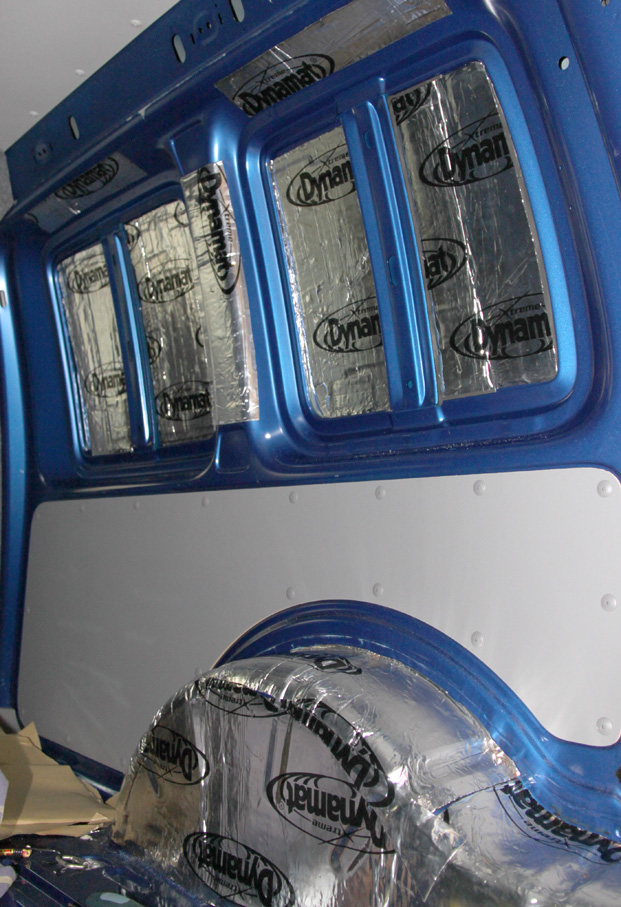
I ordered five sheets of 18" x 32" Dynamat Xtreme - which is mainly used for car boots, doors and floors. This is to be used for the rear wheel arches and side panels. I also ordered several metres of an un-branded (and slightly thinner) version for the rear floor.
Easy to cut and apply, with a bit of pre-planning the Dynamat goes on in minutes:


A quick tap of the panels and the difference is instant; from tink-tink to thonk-thonk. Getting in and closing the doors no longer feels like getting in an empty van. More on the sound-deadening on the floor coming soon...
Dynamat in it's various forms has been around for a number years and seems to be de rigueur when it comes to lining the inside of a vehicle. I started reading up on sound-deadening on both the Caddy2k forum and the Edition38 forums to see what products others have used and how they applied it. The only downside of Dynamat - the cost.
My next port of call was eBay to see what sort of prices could be found on there. Pretty good, but after a little more searching and calculating price per square-foot, a car audio company selling on Amazon worked out the best.
I ordered five sheets of 18" x 32" Dynamat Xtreme - which is mainly used for car boots, doors and floors. This is to be used for the rear wheel arches and side panels. I also ordered several metres of an un-branded (and slightly thinner) version for the rear floor.
Easy to cut and apply, with a bit of pre-planning the Dynamat goes on in minutes:


A quick tap of the panels and the difference is instant; from tink-tink to thonk-thonk. Getting in and closing the doors no longer feels like getting in an empty van. More on the sound-deadening on the floor coming soon...
Saturday 19 November 2011
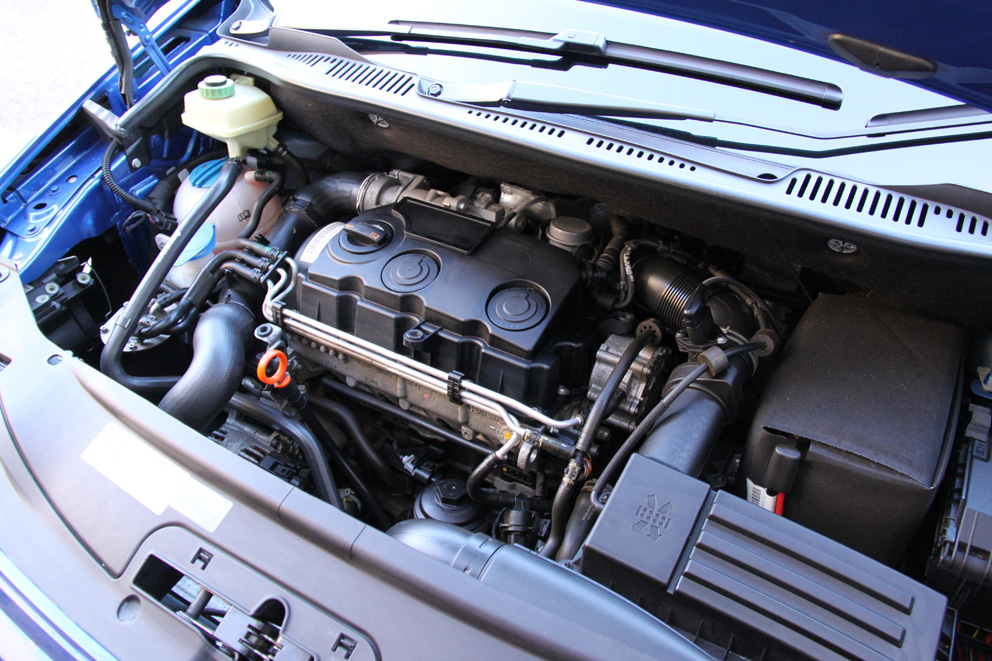
Engine Covered
Now there's not many jobs under the bonnet that I'll tackle myself, but this one is probably the easiest of all!

Let's face it, the 1.9TDI engine in the Caddy isn't the most aesthetically wonderful piece of engineering, and the lack of an engine cover only adds to the basic-van-austerity-look... time to cover it over.
The 1.9TDI is a familiar engine across the whole VAG range; appearing in VWs, Audis and Skodas. For this particular model I needed to look for one that would fit the 'BLS' coded engine - picked out by the oil-filler being on the left. After scouring eBay for a week or two (finding nothing but broken or over-priced offerings from dismantlers), this Audi version came up on the Caddy2k forums.

The mounting points are already on the Caddy's engine, all I have to do is pop the inner section on first, then press the outer section into place. The under-side of the covers have a rubber surface to them which is supposed to 'dampen' engine-noise. So far I can't say I've noticed any difference (although I am missing the under-bonnet lining of higher-spec'd models).
Here's the cover in place:


Looks like it was always meant to be there. And fills out the engine bay too, making the engine look bigger - so that must give me another 15bhp, right?
Sunday 13 November 2011
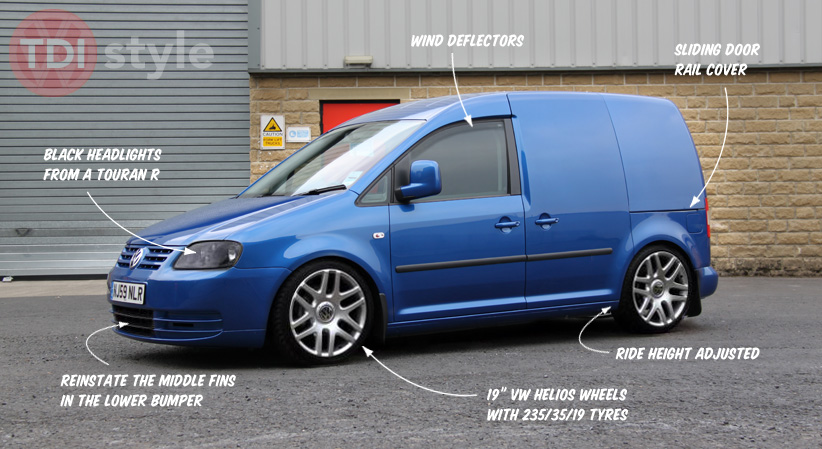
Exterior: to-do list
Having had a fairly miserable day wrestling with the two large ply panels from the back of the van (unscrew, lift them out, trim a bit, screw them in, out again, trim a bit, repeat, repeat, repeat...) I thought I'd cheer myself with a spot of Photoshop-modding.
With the Bentley wheels now sold I'm currently in discussions with a chap from the Caddy2k forum who has several sets of VW Helios wheels being refurbished. One of these sets now has my name on them!
The Helios was an optional-extra on Volkswagen's luxury Phaeton range. So as you can imagine, they're pretty hard to come by. You could walk into your local dealership and order a set. Better still you could go to your local TPS and price a set up. This would currently cost you over two and a half grand!!!
Anyway, back to the Photoshopping:
The 19's immediately look more at home (and less like an exaggerated Hot-Wheels toy) than the 20" Bentleys. Being from the Volkswagen family sits well with me; I'm a big fan of the OEM+ look or in other words 'what VW would have done if they could dip into the parts bin regardless of cost'.
Black headlights from a Touran R-line help set the Caddy off from being just another van - these are a straight swap too; no messing, trimming or fudging required.
Wind deflectors - just because I like them - will probably look for a slimline set from Heko.
Sliding door rail cover - I'll be looking to get one of the excellent kits from Reflex Auto Design - as these come painted I might also treat myself to the Sportline rear spoiler at the same time.
Finally, I'll be looking into reinstating the fins that have been cut away from the lower part of the front bumper. Initially I'll be looking to source a secondhand bumper off eBay and chopping it up. If that doesn't work I might push the boat out and fit a Touran front end.
Oh, and there's another part in the post - a little something for under the bonnet - will keep you posted when fitted...
With the Bentley wheels now sold I'm currently in discussions with a chap from the Caddy2k forum who has several sets of VW Helios wheels being refurbished. One of these sets now has my name on them!
The Helios was an optional-extra on Volkswagen's luxury Phaeton range. So as you can imagine, they're pretty hard to come by. You could walk into your local dealership and order a set. Better still you could go to your local TPS and price a set up. This would currently cost you over two and a half grand!!!
Anyway, back to the Photoshopping:
 |
| Click for bigger version |
Black headlights from a Touran R-line help set the Caddy off from being just another van - these are a straight swap too; no messing, trimming or fudging required.
Wind deflectors - just because I like them - will probably look for a slimline set from Heko.
Sliding door rail cover - I'll be looking to get one of the excellent kits from Reflex Auto Design - as these come painted I might also treat myself to the Sportline rear spoiler at the same time.
Finally, I'll be looking into reinstating the fins that have been cut away from the lower part of the front bumper. Initially I'll be looking to source a secondhand bumper off eBay and chopping it up. If that doesn't work I might push the boat out and fit a Touran front end.
Oh, and there's another part in the post - a little something for under the bonnet - will keep you posted when fitted...
Saturday 12 November 2011
Carpet lining begins...
Just a couple of hours today to carpet a few panels so I've started with the easy ones - these didn't require any trimming, just a quick tidy-up.
The panel as I left it last week after sound-proofing and insulating:

Rather than line the panel and have the Volkswagen clips showing, I'll be changing over to these 'blind' clips:

And here's the finished panel in place, the first of quite a few:

Clips and lining carpet supplied by the very knowledgeable Mark at MegaVanMats. If you've any interior questions, he's your man.
B-pillar trims
Having had the bulkhead out for a week now, I've been mulling-over what to do about the unsightly 'half-trim' left behind by it's removal - as shown in the picture below:

One option would be to cost up and order a set of B-pillar trims from a Caddy Maxi Life. Another, slightly cheaper option, would be to trim down the existing bulkhead into long thin strips that would then fill the void.
Being a cost-conscious Yorkshireman I went for the latter. Here's an indication of the cut line:

So it was out with a tape measure, marker pen and Dremel. Then straight onto the first of the carpet trimming jobs - it's been a while since I've done any trimming so I thought I'd plough straight into quite a complex shape.
Here's the end result, bolted back in where the bulkhead was originally bolted:

I'm fairly happy with it. I can see it coming out again for a tidy-up but it's certainly neater than before.
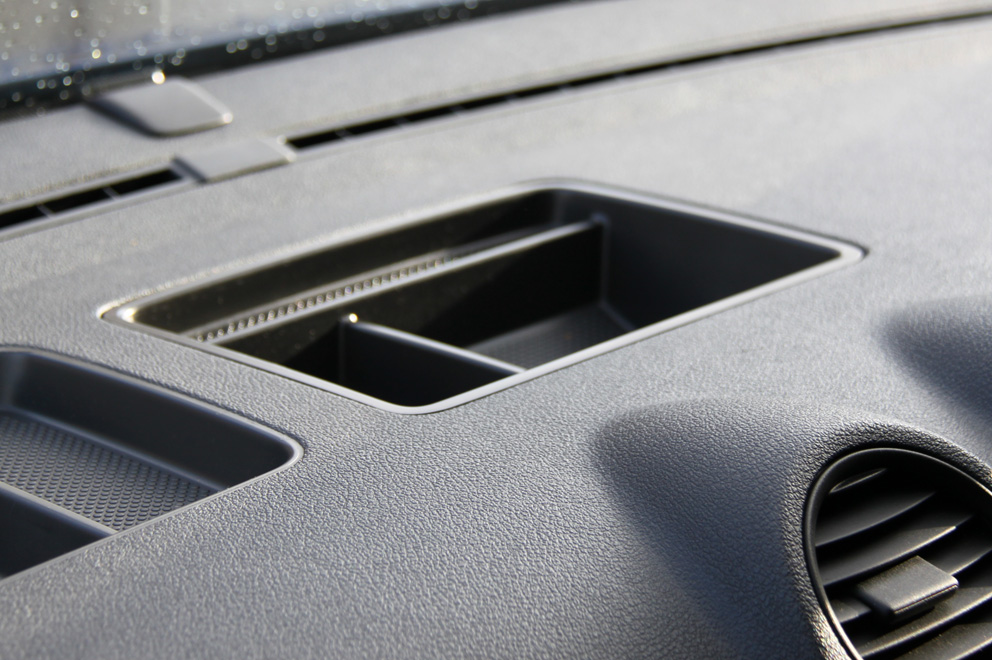
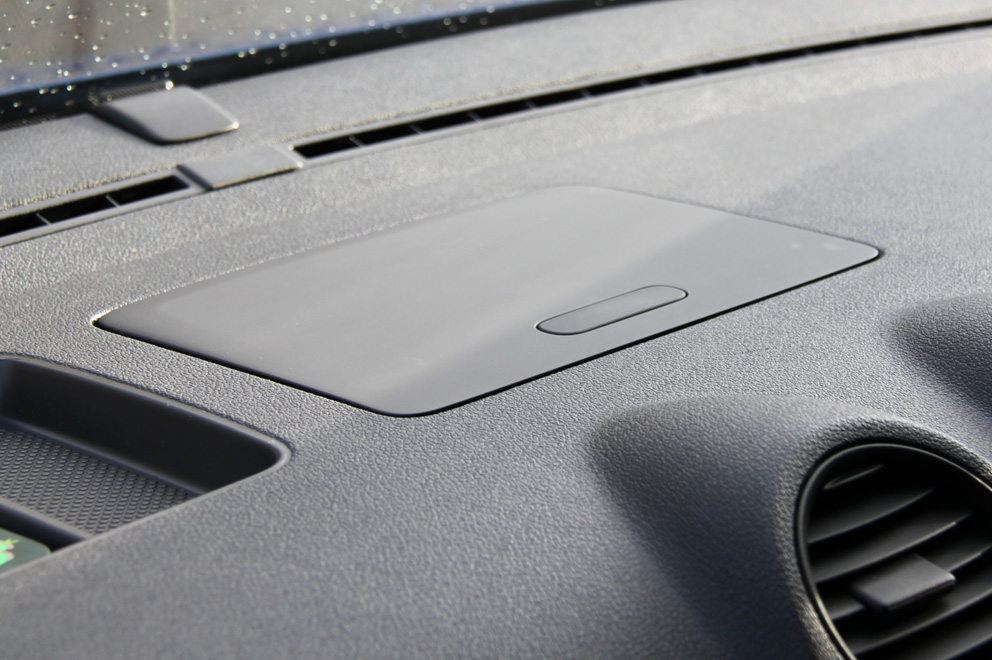
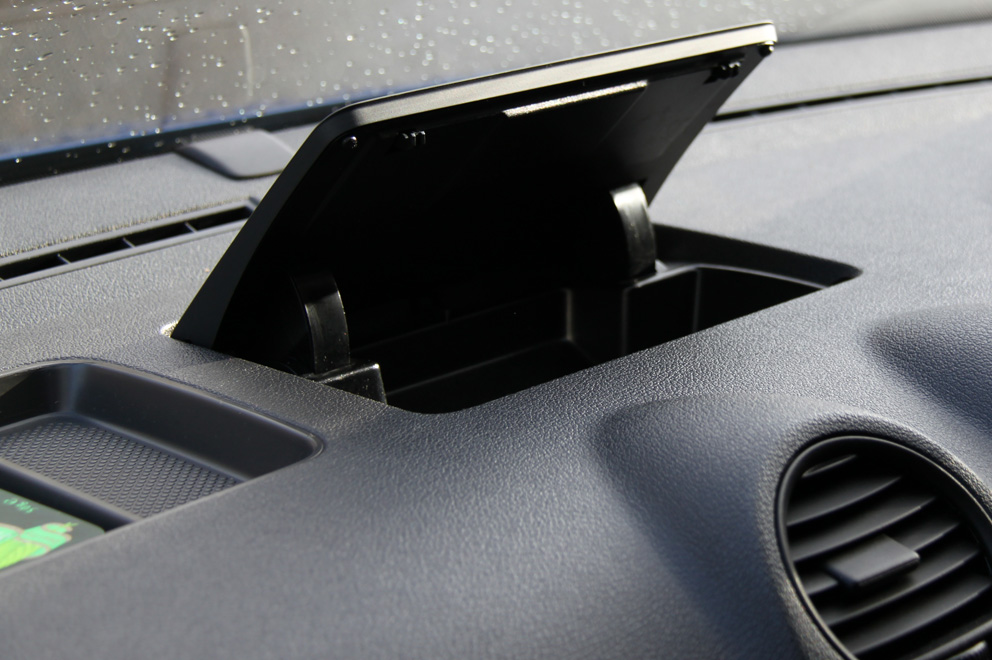
Covered dash tray
If you're a fellow Caddy owner, you'll know there's not many spots to keep things out of view. There's the overhead cubby-hole but other than that, everything else is on display.
I first saw this mod on the Caddy2k forums and have been looking around for a while for the part (not wanting to pay Volkswagen the £90 for a new one) when one appeared on eBay.
Here's the old dash tray:

And here's the covered replacement:


Nothing more than a simple case of carefully unclipping and lifting the old one out and snapping the new one into place. If you're keen to do a similar modification, the part you need to look out for is: 2K0858329E75R
I first saw this mod on the Caddy2k forums and have been looking around for a while for the part (not wanting to pay Volkswagen the £90 for a new one) when one appeared on eBay.
Here's the old dash tray:
And here's the covered replacement:
Nothing more than a simple case of carefully unclipping and lifting the old one out and snapping the new one into place. If you're keen to do a similar modification, the part you need to look out for is: 2K0858329E75R
Sunday 6 November 2011
Winter mode pt.2

Saturday 5 November 2011
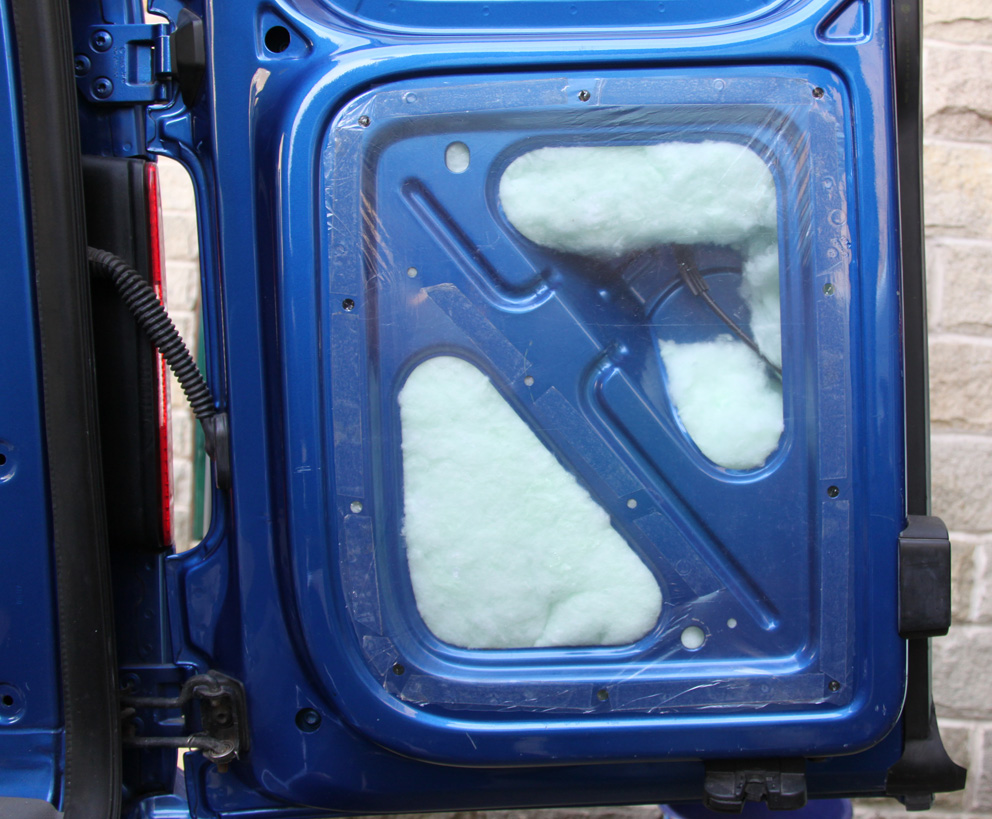
Sound proofing and insulation
With the floor up and the bulkhead out, it's time to look at the interior panels, sound-proofing and insulation. To reduce the echo of an empty van you simply have to add some weight the bare panels. Road noise and vibration travels through the panels and becomes amplified, to reduce this resonance effectively and efficiently I like to apply self adhesive flash banding as used by roofers.

The first step is to remove all the interior panels:


If you're familiar with VW interior trim, you'll be friendy with those little clips that can be such a hindrance to progress. I've found the perfect tool for coaxing them out without wrecking them:

Next we add the flash banding in strategic positions on bare, open areas of panel:

Followed by a high-grade, flame retardant insulation material:

Then a final layer of polythene to seal it in:

Finally it's just a matter of replacing the interior panel.
I've not shown the panel back in as it's just raw ply. Watch this space for more details on interior fabrics soon...
To end the day's work I thought I'd have a trial-run of the type of load the rear will be carrying. Again, more details on bike mounts are to follow...


The first step is to remove all the interior panels:

If you're familiar with VW interior trim, you'll be friendy with those little clips that can be such a hindrance to progress. I've found the perfect tool for coaxing them out without wrecking them:

Next we add the flash banding in strategic positions on bare, open areas of panel:

Followed by a high-grade, flame retardant insulation material:

Then a final layer of polythene to seal it in:
Finally it's just a matter of replacing the interior panel.
I've not shown the panel back in as it's just raw ply. Watch this space for more details on interior fabrics soon...
To end the day's work I thought I'd have a trial-run of the type of load the rear will be carrying. Again, more details on bike mounts are to follow...

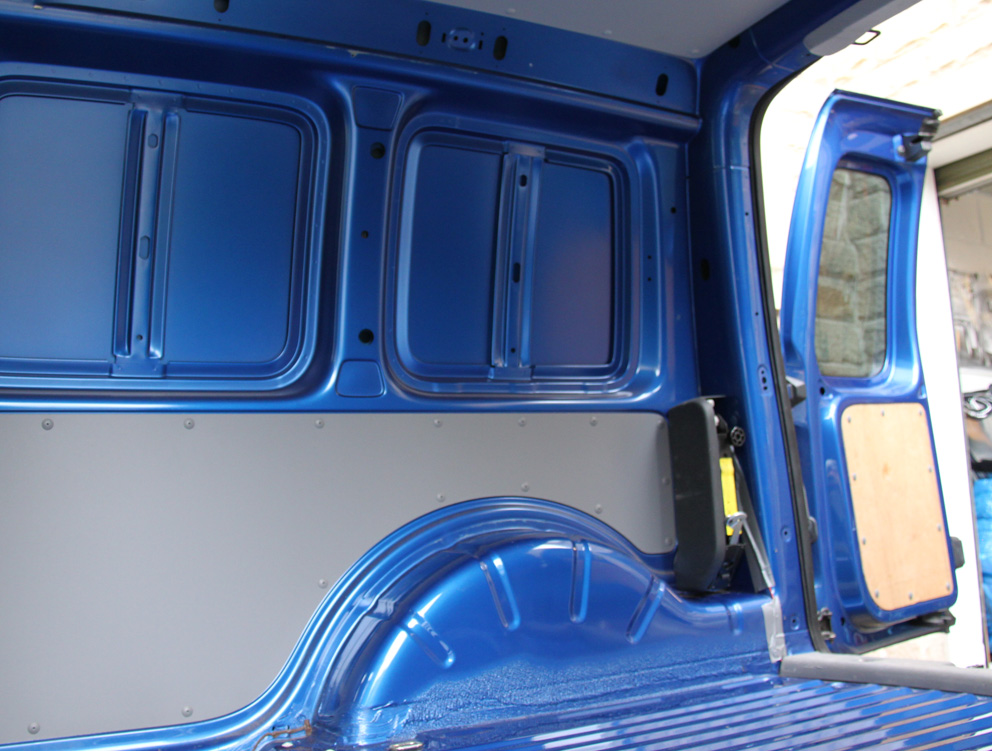
Floor and bulkhead out
In a quest for a bit more legroom it's time to take the bulkhead out. But first, the floor in the back has to come up. So fueled-up on coffee and cake, it's straight on to lifting the floor:

A relatively straightforward job; just a case of go easy on the cheap screws taking care not to round any of the heads off. Up comes the floor to reveal a couple of years' worth of sawdust and rubbish:

With a little elbow-grease the floor comes up looking factory-fresh (a shame to cover it over!):

Then, with the floor out I can turn my attentions to the bulkhead. Another simple job; just work your way around the bulkhead taking out the torx-headed bolts.

Splitting the bulkhead into two halves by undoing the bolts down the spine certainly makes it easier to remove. 10 minutes later and it's out:

Finally I can get the seat back that extra couple of inches. Removing the bulkhead immediately makes the cab feel more spacious, rear visibility is miles better without it obscuring the view. Now to start hunting some B-pillar trims from a Caddy Maxi to finish the interior trim.
Tuesday 1 November 2011
Winter mode
The transformation for Winter is complete:

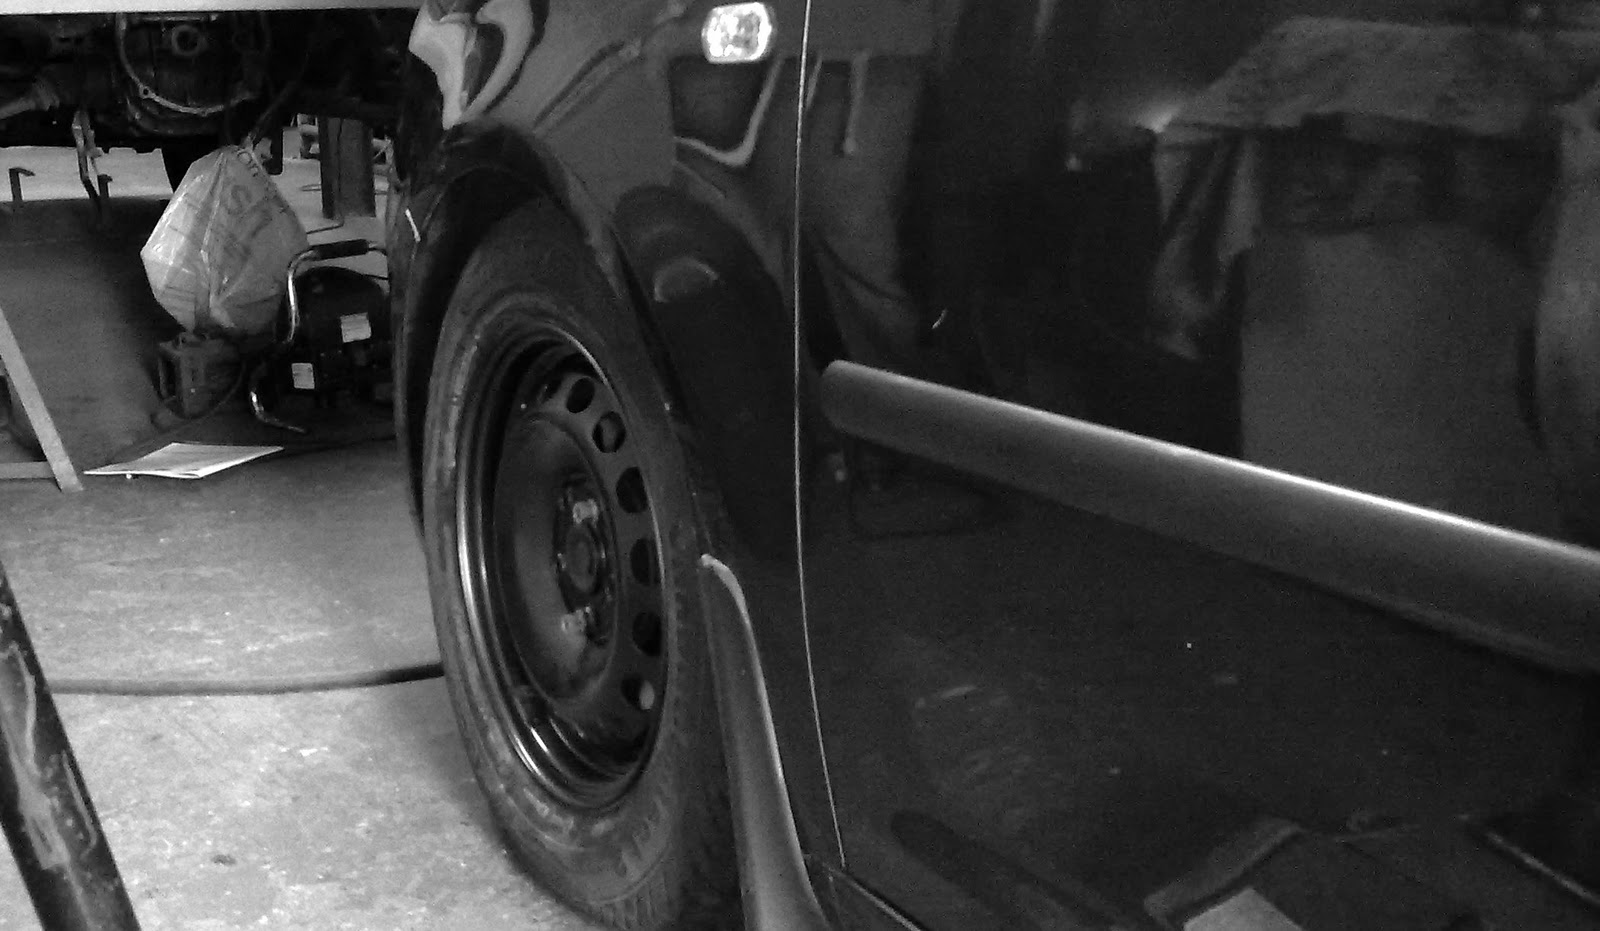
On go the steel wheels and up goes the ride-height. The acid-test; will it get up the parent's driveway?

Only just, but yes. Certainly better than before when we had no hope of getting up the driveway for a Sunday dinner!
One downside (although I'm thankful we spotted it) is one of the rear V-Maxx shocks has let go. It's shock-absorbing properties are still okay, but the top mount has all but fallen apart, not good.
This is what happens when buying cars, especially modified by the previous owner; can you be sure what you're letting yourself in for? We test drove the van with it full of tools and thus forgave the odd clonk - in hindsight this was a mistake. It wasn't until driving around with an empty van that you begin to hear noises out of the ordinary. I'm annoyed, but it can be rectified with a fresh pair of shocks - I might even upgrade to better quality KW items.
On go the steel wheels and up goes the ride-height. The acid-test; will it get up the parent's driveway?
Only just, but yes. Certainly better than before when we had no hope of getting up the driveway for a Sunday dinner!
One downside (although I'm thankful we spotted it) is one of the rear V-Maxx shocks has let go. It's shock-absorbing properties are still okay, but the top mount has all but fallen apart, not good.
This is what happens when buying cars, especially modified by the previous owner; can you be sure what you're letting yourself in for? We test drove the van with it full of tools and thus forgave the odd clonk - in hindsight this was a mistake. It wasn't until driving around with an empty van that you begin to hear noises out of the ordinary. I'm annoyed, but it can be rectified with a fresh pair of shocks - I might even upgrade to better quality KW items.
Sunday 30 October 2011
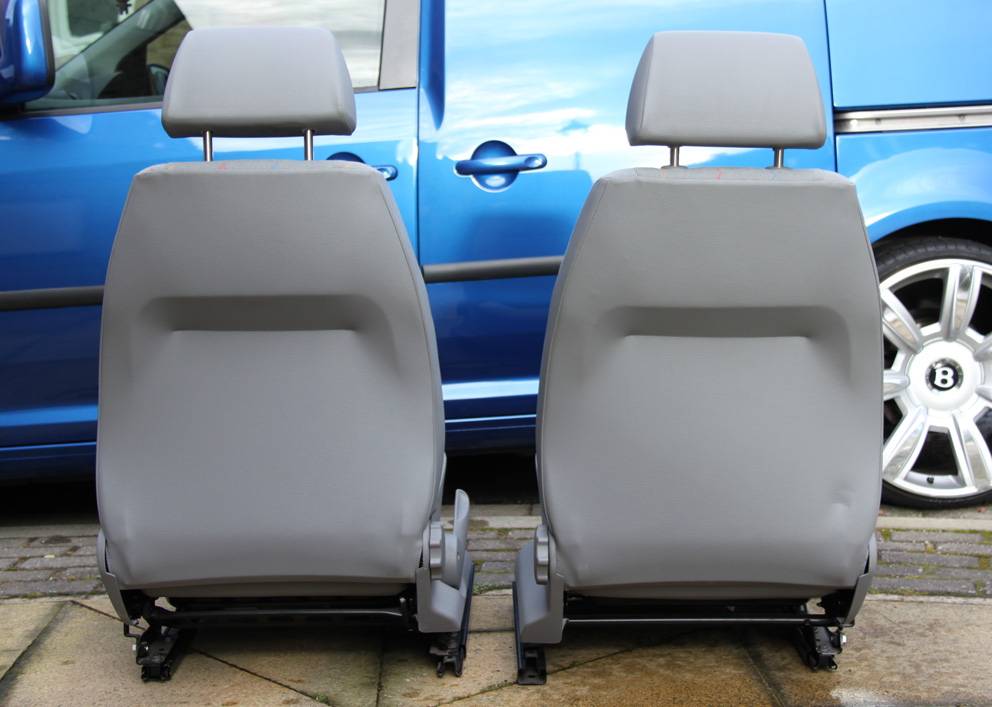
Seats for sale
Not only did the van come with original wheels and suspension parts to put the van back to standard. The seller also included the original seats - not something I was expecting. I can't see me ever needing to swap back to these so they're up for grabs.
Almost perfect in condition with only minor scuffs to the plastic trim, this is a driver's and passenger's seat in the Inca pattern. Cloth is unmarked and as-new, everything works as it should:


To my knowledge they have come from the van I've just bought which is only two years old. Going rate on eBay is around £50-£80 for seats in this condition. So I'd like somewhere in the region of £120 for the pair, but would be open to sensible offers as these are taking up space.
Based in Skipton, North Yorkshire. Or available for buyer to collect from Leeds, Mon-Fri.
If you're interested, either comment below of email: rpcreative@hotmail.com
2x Tyres for sale
After changing the two mis-matched profile tyres, I now have the other two surplus to requirements. The are Vredestein Comtrac Van tyres in 195/70/15 size.
Suitable for many 15" van wheels - they look hardly used.


 Brand new these tyres are around £75 each. So, with these being part-worn I'd be looking for offers around £80 for the pair.
Based in Skipton, North Yorkshire. Or available for buyer to collect from Leeds, Mon-Fri.
Comment below if interested, or email: rpcreative@hotmail.com
Suitable for many 15" van wheels - they look hardly used.


Based in Skipton, North Yorkshire. Or available for buyer to collect from Leeds, Mon-Fri.
Comment below if interested, or email: rpcreative@hotmail.com
Subscribe to:
Posts (Atom)